SMB3: Wrong Warp (7-1) to Princess
A fascinating Super Mario Bros 3 glitch has been found that skips ahead to the game's ending with Princess Toadstool. The setup may seem complex at first, but completing SMB3 in mere minutes is rather incredible (and controversial).
After nabbing the first two warp whistles and traveling to World 7, a glitch in World 7-1 can have Mario rescuing the Princess in just over three minutes of playtime! (Imagine if all girls got off that quickly...)
This trick completely bypasses the entire Dark World, even Bowser... A screen-wrapping jump the wrong way into this pipe in World 7-1 is a known glitch that sends Mario outside the level boundaries, normally crashing the game... But three important memory values can be manipulated with Koopa shells, tricking the game into rolling the end credits.
It's easiest to perform the trick with the help of Raccoon Mario's tail. The location value for a Koopa constantly changes as they move back and forth on screen. Stomp or kill one, and the co-ordinate is set to that value until they respawn or another enemy takes their place.
It doesn't work every time because it's difficult to line everything up. Most of the Koopa shells need to be placed perfectly, to the pixel. (This trick also cannot be completed in the Super Mario All-Stars version)
I found the following videos helpful...
The first video is 10 minutes long - And even if your mind is blown by all the technical details, it's really interesting to see what's happening behind the scenes in the game's code... Which helps to understand why these variables are so important to make the glitch work. The second video is a simple explanation. Third video is a simple playthrough performing the glitch.
Super Mario Bros. 3 - Wrong Warp (10:06) by Retro Game Mechanics Explained
https://www.youtube.com/watch?v=fxZuzos7Auk
Super Mario Bros. 3 - How to do the 7-1 wrong warp glitch! (Easy setup) (7:17) by Taven Webb
https://www.youtube.com/watch?v=d9FoUjvU4KI
(video is taken from handheld device, but setup is easy, as advertised)
Completing The SMB3 Wrong Warp Successfully (3:57) by Antique Girl
https://www.youtube.com/watch?v=y73griqeHNk
A collection of notes and screenshots from a few successful attempts:
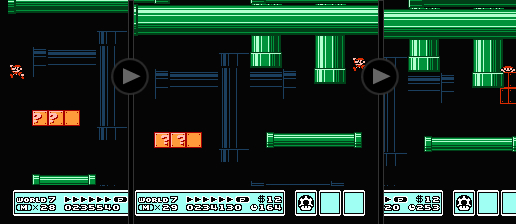
First step involves knocking the level's first Koopa down to the bottom of the screen instead of outright killing him... (He'll be used at the end of the trick to set the last value.) Kill all three piranha plants, which clears out the memory slots for the Koopas to be placed.
The first shell is easy to place. Immobilize the pacing Koopa Troopa between the question blocks and carry him to the far right side of the right question block and kill him by running him into the block and kicking him up against it. His last on-screen position is now set.
Move left on top of the pipe and hit the Paratroopa with your Racoon tail, quickly hopping down to catch his shell. Carrying it back down with you.
Bounce this Koopa shell and stomp it so the shell lands precisely beside this pipe. This is the most difficult variable to set, because a single pixel to the left or right and the value will be wrong. Fortunately, you can re-position the shell if needed before you move on to the last step. (Note how the white pixels of the shell are lined up relative to the outline of the pipe.) Just hop back down the pipe before he rouses to set that value.
Back to the start of the level to find the first Koopa. This value is relatively simple to set. Because the final pipe glitch is easier to perform with small Mario, Super Mario holds this Koopa shell right beneath this pipe.
Jump up into the overhead pipe as the carried Koopa begins to shake himself awake... . Once at the top of the pipe, as soon as the Koopa touches and shrinks Mario, immediately slam down so Mario goes back down the pipe, which should freeze-frame the final Koopa in the perfect position (shown above right).
Performing the pipe glitch at the start of the level (after everything else has been set), the screen temporarily goes black, and the same messed up textures appear...
But if everything lines up, and the correct values are in place, Mario returns on screen standing on this block. A simple jump with 'A' can trigger the game into loading the Princess room and end-game sequence, plus an arsenal of P-Wings for your efforts.


Post a Comment